 Printwear & Promotion The Total Promotional Package
 In the first of a two-part series of articles on discharge printing, William Shorter, product manager of Chemicals Products and Services, and Liam Stubbings of Pyramid Screen Products and Pyramid Textiles Group, explore the key steps to successful discharge printing.
With the forecast for high-end textiles set to grow, the demand for soft-finish prints on dark garments continues to increase creating the need for more discharge screen printing. This printing process can be quite daunting due to its complexities and special demands on the durability of the stencil systems during long print runs. This article looks at screen making – from selecting the right products to recommended processing techniques.
1) Choose the correct emulsion. Discharge screen printing inks are one of the most aggressive ink systems for textile screen printing. They have a tendency to cause both mechanical (caused by discharge additives and wear of the squeegee) and chemical breakdown of direct emulsion stencils. Not only should the stencil have robust water resistance, it should also be specifically designated as resistant to discharge inks. Typically the stencil system will either be a dual cure diazo emulsion, water resistant photopolymer emulsion or a water resistant photopolymer emulsion with the addition of diazo.
2) Choose the correct mesh count. Mesh count directly affects your ink deposit so, we advise 35 to 48 threads per cm for clear base and base whites and 48 to 90 threads per cm for halftones and fine detail.
3) Recommended mesh tension. Minimum mesh tension should be >20 newtons. Preferably all meshes should have the same mesh tension for accurate registration. Invest in a tension meter, as it might save you time in the process and reduce the risks of poor registration.
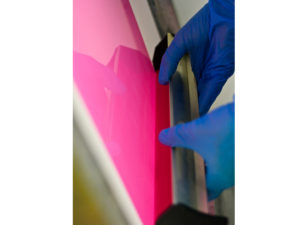
4) Emulsion coating guidelines. Coat the emulsion with a round edged trough, noting that too thin a stencil may break down and pinhole during printing. However, make sure that thicker coatings are dried and exposed fully in order to get the best print life. For an emulsion with a solids content of less than 40% you will need to coat at 1+2, 2+2 or greater. For emulsions with a solids content greater than 40% you will need to coat at 1+1 or 1+2 and always coat slowly to reduce air bubbles which could cause pinholes
5) Dry the emulsion thoroughly. All drying cabinets for direct stencil systems should have a maximum temperature of 40°C with ideal conditions being 30-35°C with a low relative humidity. If the screen is not dried thoroughly it will break down quickly on the press. This is why in the summer months when the humidity increases, screen printers often experience more screens breaking down. Mixing wet screens in a dryer, which have been exposed and washed out, along with freshly coated screens, is another common reason for poor drying and stencil breakdown. Top tip: installing a dehumidifier can help with managing humidity levels in the dryer.
 6) Don’t under expose. Under exposure of the emulsion is one of the most common mistakes and will compromise stencil durability. It is really important to check the exposure time of your emulsion periodically to see signs in reduction of UV lamp output. Ideally, this should be done every month using an exposure calculator. Where possible, and specifically when wanting to print fine detail, the use of yellow or orange mesh should be your preference as white mesh can cause undercutting due to reflection of the light during exposure. Increased use of CTS (computer to screen) equipment means that stencils are exposed with different forms of laser or LED light sources. Particular care needs to be taken to ensure correct exposure and ‘through cure’ of the stencil. Top tip: If the emulsion feels slimy on the squeegee side during washing out, you haven’t achieved full exposure and print durability will be compromised.
7) Chemically harden or post expose? If you’ve completed step 6 correctly you shouldn’t need to post expose. Post exposing a dual cure emulsion will have very minimal effect on the durability of the stencil system, whereas Photopolymer emulsions can significantly benefit from post exposure. Chemical hardening can help improve the durability of stencil systems for discharge printing, especially for long print runs. However a drawback to chemical hardening is that stencil decoating will be compromised and you may have to resort to using a knife to cut out the mesh rather than using a stencil remover.