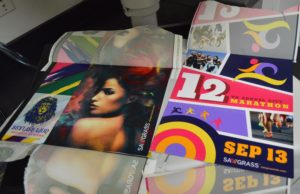
Digital decorating is an art form. Yes, there is a certain level of technical knowhow that needs to be developed in order to be a successful decorator. You will have to learn how to use some kind of graphics software. After all, you’ll be decorating products digitally. The experts at Sawgrass explain further.
Your business success truly lies in what graphics you offer, to whom they appeal and the quality of the images on your final products. Without high-quality graphics that deliver some kind of value to a customer, products simply won’t sell.
There are many ways to go about this. We’re going to take a look at five essentials that every new sublimator and those who are thinking of getting into the business should know.
1) Graphic sources
There are lots of different types of jobs you’ll get as a digital decorator. Some customers will have a vague idea of what they want and are looking to you to create a design just for them. Others already have graphics that they want transferred onto a product.
With this first type of order, your creativity and graphic knowledge will be put to the test. These jobs start with conversations with your customer to fully understand what they want, and then a search for all the elements needed to create design options for them.
2) Locating libraries
There are lots of image libraries and clip art software available for purchase and/or subscription basis. These costs, which can be substantial, should be figured into your startup figures and product pricing. Plus, you will also have to spend some time putting together all of your graphics into a design that fits your customer’s needs, which should also affect your price considerations.
It’s important to note that if you do choose this option for graphics, you should carefully check the licensing requirements for the images. Always double check your graphics source to ensure you are using images legally.
3) Customer supplied
If your customers provide you with images for their order, you face a different set of challenges. You no longer have to track down graphics, but you will have to figure out how to work with the images you’re given. Customers who have a working knowledge of graphics and printing make life much easier for you as a sublimator.
Most customers, however, will not have that level of knowledge. This means that you will have to learn what type of files you need and, in some cases, how to convert (or sometimes recreate) what you’re given into what you need to get the job done.
4) Understanding types of graphics
JPEG. DPI. Vector. Bitmap. If you haven’t already heard of these terms, you will soon. These are the keys to helping you produce the quality images that stop people in their tracks and garner high profit margins.
Dye sublimation is, by its nature, a high-definition print technology. In the past, you could take high-resolution graphics (up to 600dpi) and transfer them onto substrates for phenomenal effects. New HD product decorating systems enable printing in resolutions up to 1200dpi, this means greater colour, clarity and precision is possible.
When we talk about dpi – dots per inch – we’re talking about the number of pixels that make up a digital image. The higher concentration of pixels, the higher the resolution of the image.
Print applications need much higher resolution images. Anything that is 300dpi or greater is considered high resolution. The rule of thumb is to get as high a resolution image as possible from your customer. You’ll be able to reduce the resolution for more efficient printing, but increasing it can be very problematic.
There are two main types of graphics that you’ll be working with as a sublimator: raster/bitmap images and vector images. Raster or bitmap images come with familiar names, like JPEG, TIFF, BMP and GIF. Each has its pros and cons. For example, JPEG and GIF files lose resolution and colour information the more you edit them, and TIFF and BMP files tend to be very large.
You’ll also want to make sure that the images are high definition, as well as resolution. A 300dpi image can still be grainy, pixelated or blurred. First review the image’s quality and then look at the resolution. Adjusting the resolution of a low-quality image will not increase its quality, only enlarge the file size.
Vector images are different in that there is no pixelation, as each element is mathematically calculated and has the same uniform fill colour between points. This means you can infinitely size the image up or down without any loss of quality. Clip art and professionally designed logos are usually created as vector images (EPS or WMF files).
Always ask for logos in vector format, as this is the only way you’ll be able to re-colour elements to match spot colours in sublimation. If they don’t have a vector version, ask for a high resolution bitmap, which you may be able to convert to a vector using your design software.
5) Create samples
Trial and error is your best friend when getting started in sublimation. Figuring out the best software, techniques and protocols when it comes to graphics is no different. Expect to spend some time with your system and software at the beginning of your journey, to gain an understanding of what you’ll need to do in order to generate outstanding prints for years to come. The investment in time and sample products is well worth it, as your production will be streamlined once the orders start coming in.
Also, look for online resources to help you along the way. There are tons of books, videos, articles and tutorials out there for those just starting out with graphic design and product decoration. Take advantage of the knowledge of others, and in no time, you’ll be sublimating up a storm.
 Printwear & Promotion The Total Promotional Package


