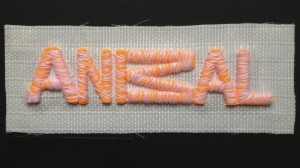
 One of the most talked about techniques at this year’s Printwear & Promotion LIVE was how to embroider with 3D foam, also known as Bodybuilder.
It wasn’t hard to see why; offering something new to customers isn’t always easy, but one effective way to literally stand out from the competition and increase sales is to offer raised 3D embroidery.
Simply by using 3D foam a flat 2D design can be totally transformed and brought to life with oomph.
It’s a technique that’s been around since the 1990s but, with advances in high speed embroidery machine technology and design digitising, new heights and effects are now being achieved not only through layering the foam, but also through mixing different thread types. Using foam also eliminates the need for costly high stitch counts, the alternative way to build up a design.
Suitable for almost any type of garment – even thin delicate fabrics, provided a strong backing, such as Weblon is used – 3D embroidery is a popular choice on sportswear, fashion items and in particular on caps.
Working with Bodybuilder can also be very creative and profitable once you’ve expanded your comfort zone and mastered the art of embroidering with foam.
Here are a few hints and tips to consider before starting your trials with Bodybuilder:
Choosing the right foam density for your particular application is paramount; if the foam is too soft or stiff then removing the excess can be tricky and you run the risk of distorting or damaging the design.
It is vital to digitise your design to accommodate 3D stitching.
Choose light or dark, exact colour matches are not necessary as the foam won’t be visible once stitched.
Hoop the garment as you would for regular embroidery, including the correct backing.
If your design has a combination of regular and 3D embroidery elements, digitise and embroider the regular elements first, then program a stop at the top. Or for caps, towards the peak so the head is out of the way, allowing you to introduce the foam.
Double the stitch density and slightly increase the stitch length. By moving the stitches closer together from 0.4mm to 0.3mm you will improve coverage. Loosen thread tension to stop the foam from being compressed.
Lay the foam on top of your fabric and if necessary fix with temporary adhesive spray. Alternatively, the foam can be held in place with two stitches top and bottom to prevent movement.
To increase the height of the embroidery further, use two layers of foam. You will need to increase the pull compensation of the design to accommodate the extra thickness.
With a running stitch, create an outline of the shape to be embroidered.
For optimum results embroider the 3D foam of your design in satin stitch as this won’t flatten the foam but will cover it completely. Take care to seal off around the ends of straight edges.
By using a heavy stitch density for this process, the foam will be sufficiently covered and be perforated by the needle, making it easy to pull away the excess. A ballpoint SES needle is recommended as this will create larger perforation holes. Once the excess has been removed, hot air can be used to shrink and disperse any visible foam.
An example DST file for Madeira’s BODYBUILDER foam is available on request.
 * Madeira was founded in Germany some ninety years ago, and one of its first subsidiaries abroad was Madeira UK, based at Ripon, North Yorkshire – a one stop shop for the company’s embroidery and sewing threads, plus accessories. For more information visit www.madeira.co.uk
 Printwear & Promotion The Total Promotional Package


